Object Type Creation
In this lab we will learn how we can create new custom device certifications to collect new metrics from the network.
NOTE: it's important to remember that SevOne offers a free device certification process done by a specialist team, therefore it is not required to run the process shown on this lab manually. However some people prefer to certify devices manually, hence this is an example on how to do it.
During this lab we will show how we can import MIB files from vendors, and how we can create new SMNP object types that will allow us to collect new metrics based on the OIDs that we configure. In this lab we will focus on some custom firewall data available in Cisco ASAs, such number of ARP inspections, requests, ICMP requests, frame floods and similar.
Import MIB File
Download this MIB file from HERE
Log into the NMS
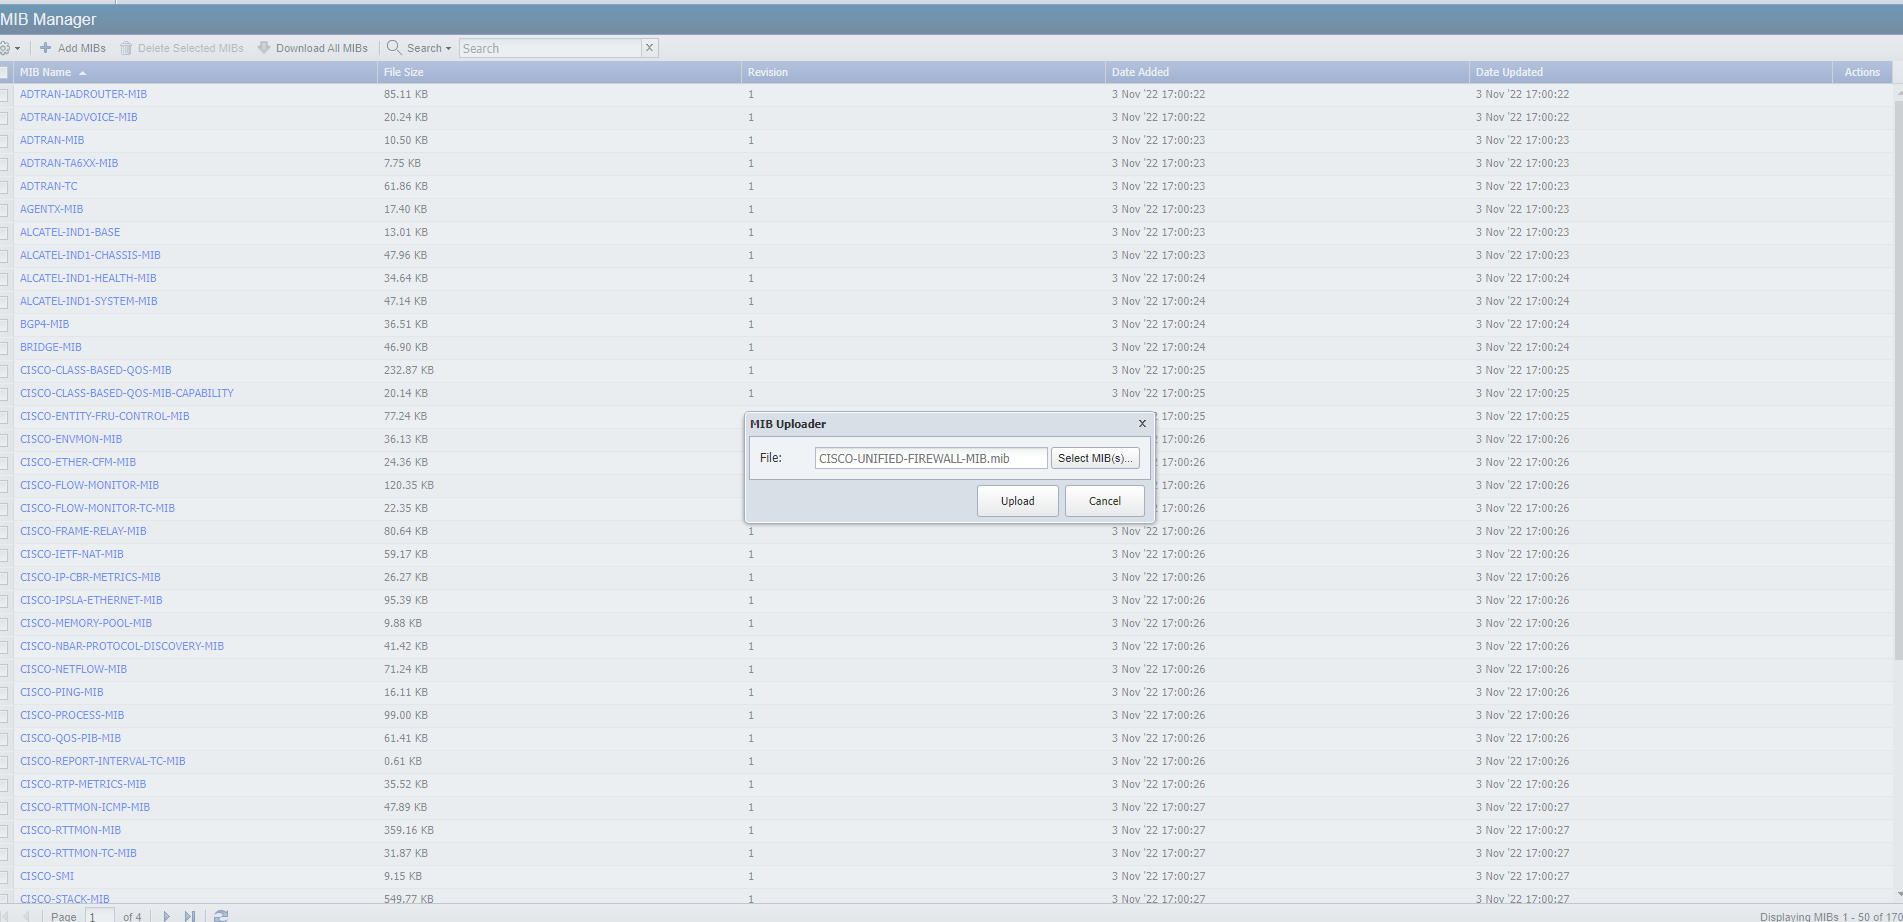
Go to administration -> Monitoring Configuration -> MIB Manager
Click on Add MIBs
a. Select MIB shared on step 1
b. Click Upload
NOTE: This step is not required to create a new SNMP object type, however it helps when troubleshooting.
Create Object Rule
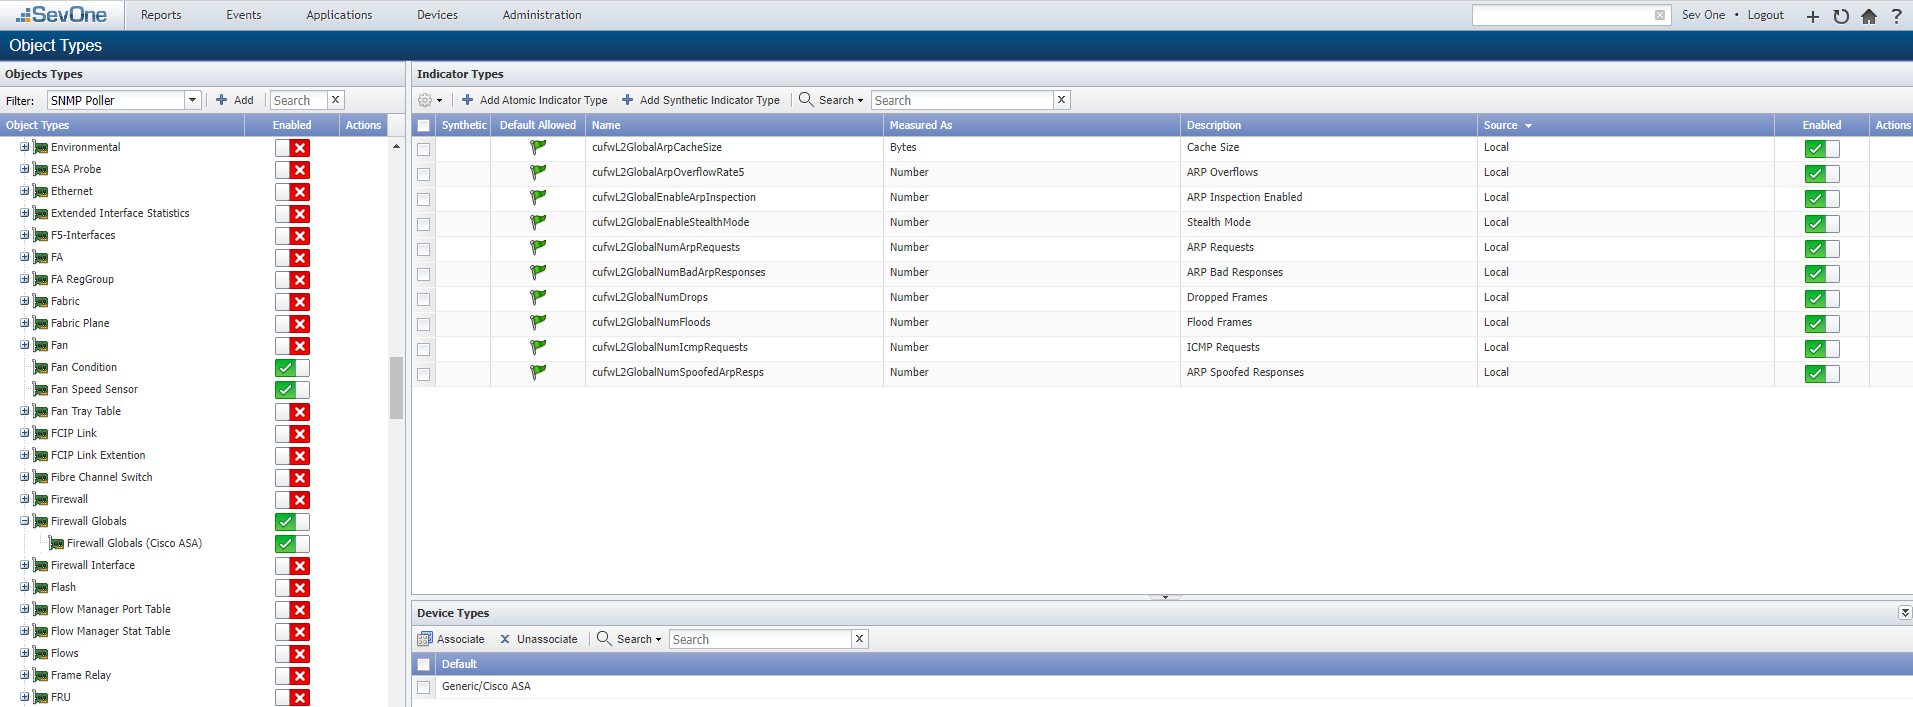
Go to administration -> Monitoring Configuration -> Object Types
Click on Add
a. Name: Firewall Globals
b. Click Save As New
Click on Firewall Globals
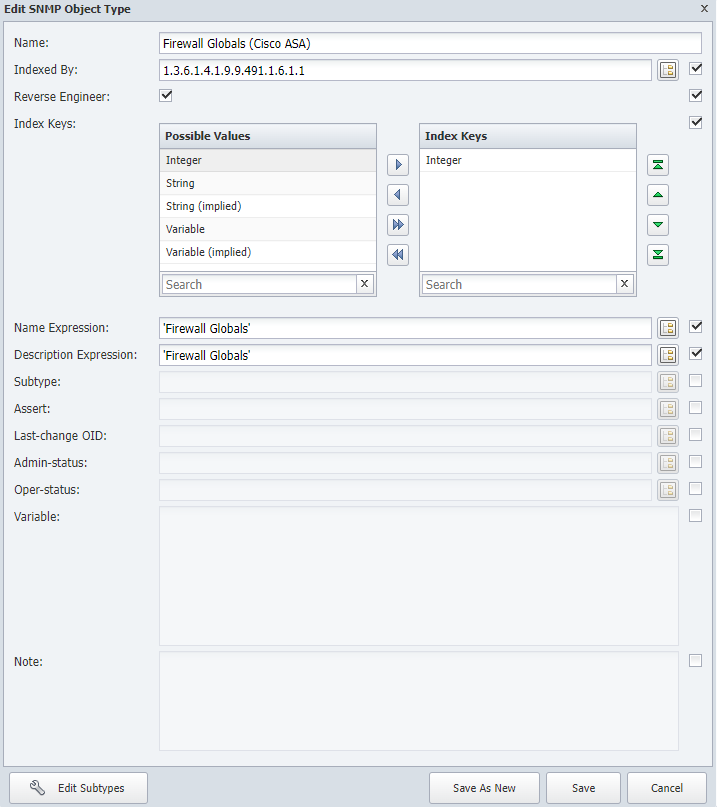
a. Click on Add
i. Name: Firewall Globals (Cisco ASA)

ii. Indexed By: 1.3.6.1.4.1.9.9.491.1.6.1.1

iii. Reverse Engineer: ENABLED

iv. Index Keys: add one Integer to the Index Keys section

v. Name Expression: 'Firewall Globals'

vi. Description Expression: 'Firewall Globals'

vii. Click Save As New
Click on Firewall Globals (Cisco ASA)
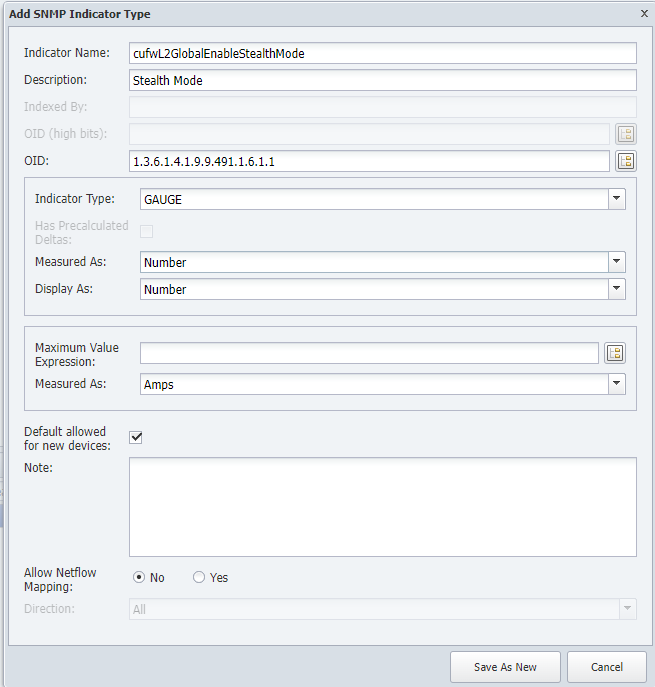
a. Click Add Atomic Indicator Type
i. Indicator Name: cufwL2GlobalEnableStealthMode

ii. Description: Stealth Mode

iii. OID: 1.3.6.1.4.1.9.9.491.1.6.1.1

iv. Indicator Type: GAUGE

v. Measured As: Number

vi. Display As: Number

vii. Click Save As New
b. Click Add Atomic Indicator Type

    i. Indicator Name: cufwL2GlobalArpCacheSize

    ii. Description: Cache Size

    iii. OID: 1.3.6.1.4.1.9.9.491.1.6.1.2

    iv. Indicator Type: GAUGE

    v. Measured As: Bytes

    vi. Display As: Bytes

    vii. Click Save As New

c. Click Add Atomic Indicator Type

    i. Indicator Name: cufwL2GlobalEnableArpInspection

    ii. Description: ARP Inspection Enabled

    iii. OID: 1.3.6.1.4.1.9.9.491.1.6.1.3

    iv. Indicator Type: GAUGE

    v. Measured As: Number

    vi. Display As: Number

    vii. Click Save As New

d. Click Add Atomic Indicator Type

    i. Indicator Name: cufwL2GlobalNumArpRequests

    ii. Description: ARP Requests

    iii. OID: 1.3.6.1.4.1.9.9.491.1.6.1.5

    iv. Indicator Type: COUNTER64

    v. Measured As: Number

    vi. Display As: Number

    vii. Click Save As New

 e. Click Add Atomic Indicator Type

    i. Indicator Name: cufwL2GlobalNumIcmpRequests

    ii. Description: ICMP Requests

    iii. OID: 1.3.6.1.4.1.9.9.491.1.6.1.6

    iv. Indicator Type: COUNTER64

    v. Measured As: Number

    vi. Display As: Number

    vii. Click Save As New

f. Click Add Atomic Indicator Type

    i. Indicator Name: cufwL2GlobalNumFloods

    ii. Description: Flood frames

    iii. OID: 1.3.6.1.4.1.9.9.491.1.6.1.7

    iv. Indicator Type: COUNTER64

    v. Measured As: Number

    vi. Display As: Number

    vii. Click Save As New

g. Click Add Atomic Indicator Type

    i. Indicator Name: cufwL2GlobalNumDrops

    ii. Description: Dropped Frames

    iii. OID: 1.3.6.1.4.1.9.9.491.1.6.1.8

    iv. Indicator Type: COUNTER64

    v. Measured As: Number

    vi. Display As: Number

    vii. Click Save As New

h. Click Add Atomic Indicator Type

    i. Indicator Name: cufwL2GlobalArpOverflowRate5

    ii. Description: ARP Overflows

    iii. OID: 1.3.6.1.4.1.9.9.491.1.6.1.9

    iv. Indicator Type: GAUGE

    v. Measured As: Number

    vi. Display As: Number

    vii. Click Save As New

 i. Click Add Atomic Indicator Type

    i. Indicator Name: cufwL2GlobalNumBadArpResponses

    ii. Description: ARP Bad Responses

    iii. OID: 1.3.6.1.4.1.9.9.491.1.6.1.10

    iv. Indicator Type: COUNTER64

    v. Measured As: Number

    vi. Display As: Number

    vii. Click Save As New

j. Click Add Atomic Indicator Type

    i. Indicator Name: cufwL2GlobalNumSpoofedArpResps

    ii. Description: ARP Spoofed Responses

    iii. OID: 1.3.6.1.4.1.9.9.491.1.6.1.11

    iv. Indicator Type: COUNTER64

    v. Measured As: Number

    vi. Display As: Number

    vii. Click Save As New
On the bottom half of the screen, click Associate
a. Select Cisco ASA
b. Click Associate
Go to Devices -> Device Manager
a. Search for FW
b. Select all the devices found, click on the gear icon -> Discovery -> Discover
NOTE: this step will take 5-10 minutes to complete
Review
Go to Devices -> Object Manager
a. Device: CHI-FW01
b. Click Apply
c. Search for Firewall Global
d. Click on Firewall Globals

NOTE: it will take some time to start showing up data because of the polling frequency (5 minutes). We can change the polling frequency of the device to 1 minute, or using High Frequency Polling on this specific object to something like 10 seconds to start see data showing up faster.